USB C Power supply replacement for Sega Saturn console PSU power board | Robot retro
Features:
- Provides convenient and efficient power to your Saturn console.
- Replaces the stock power supply in most models of Saturn (see compatibility)
- Requires a USB C wall plug and USB C cable (not included)
- Easy install, no soldering needed, screw driver needed (not included)
The OEM Saturn power supply is a combined 110v/240v AC to DC converter. This is quite inefficient and noisy, which can manifest in a “fuzzy” video signal.
Also, plugging in a UK 240v supply to a 110v Japanese Saturn can cause damage to the Dreamcast.
Compatibility: This upgrade is compatible with all Saturn models with the exception of VA0 (Type A power supplies).
Works with Fenrir ODE optical drive replacement mod.
You will need your own USB C wall adapter and USB C cable, a 5v or 20v Power Delivery USBC charger such as those from Anker, uGreen and other reputable brands, most 30W charger USBC will work (they have to be able to output 15v/20v)
A screwdriver is the only thing needed to install this power board, no soldering or other technical skills needed. (Screwdriver not included)
What the robot_retro Saturn Power Board Offers:
Powered from a 15v or 20v Power Delivery USBC charger (e.g. Ankur, Dell, uGreen, etc.). Most 30W charger USBC will work (they have to be able to output 15v/20v).
Works with all PAL and US/Japan NTSC models except VA0 (Type A power supplies). Also removes the risk of accidentally plugging in 240V into a 110V system and causing damage.
Works perfectly with Fenrir.
Includes 5V header for Noctua fans and dedicated 12V/9V/5V/3.3V/GND 2.54mm pin headers for other power-hungry mods
Tested to be between 90 and 95% efficient across all loads.
Low signal noise and heat.
Drop in solution. No soldering, wires or complicated install required.
No flashing LEDS, perfect for clear shells.
Overvoltage, over temperature and fused supply.
3D printed spacer.
Other 3D spacer colours can purchase seperately
Voltage Setting:
The following voltage should be set using SW1 (instructions are also on the back of the PCB):
Type A (VA0) = Not compatible so N/A
Type B (VA1 to VA5) = +9V
Type C NTSC (VA6+) = +9v or +12v (either will work)
Type C PAL (VA6+) = Check original or use 9v if unsure
Installation:
A Phillips #2 screwdriver recommended for installation.
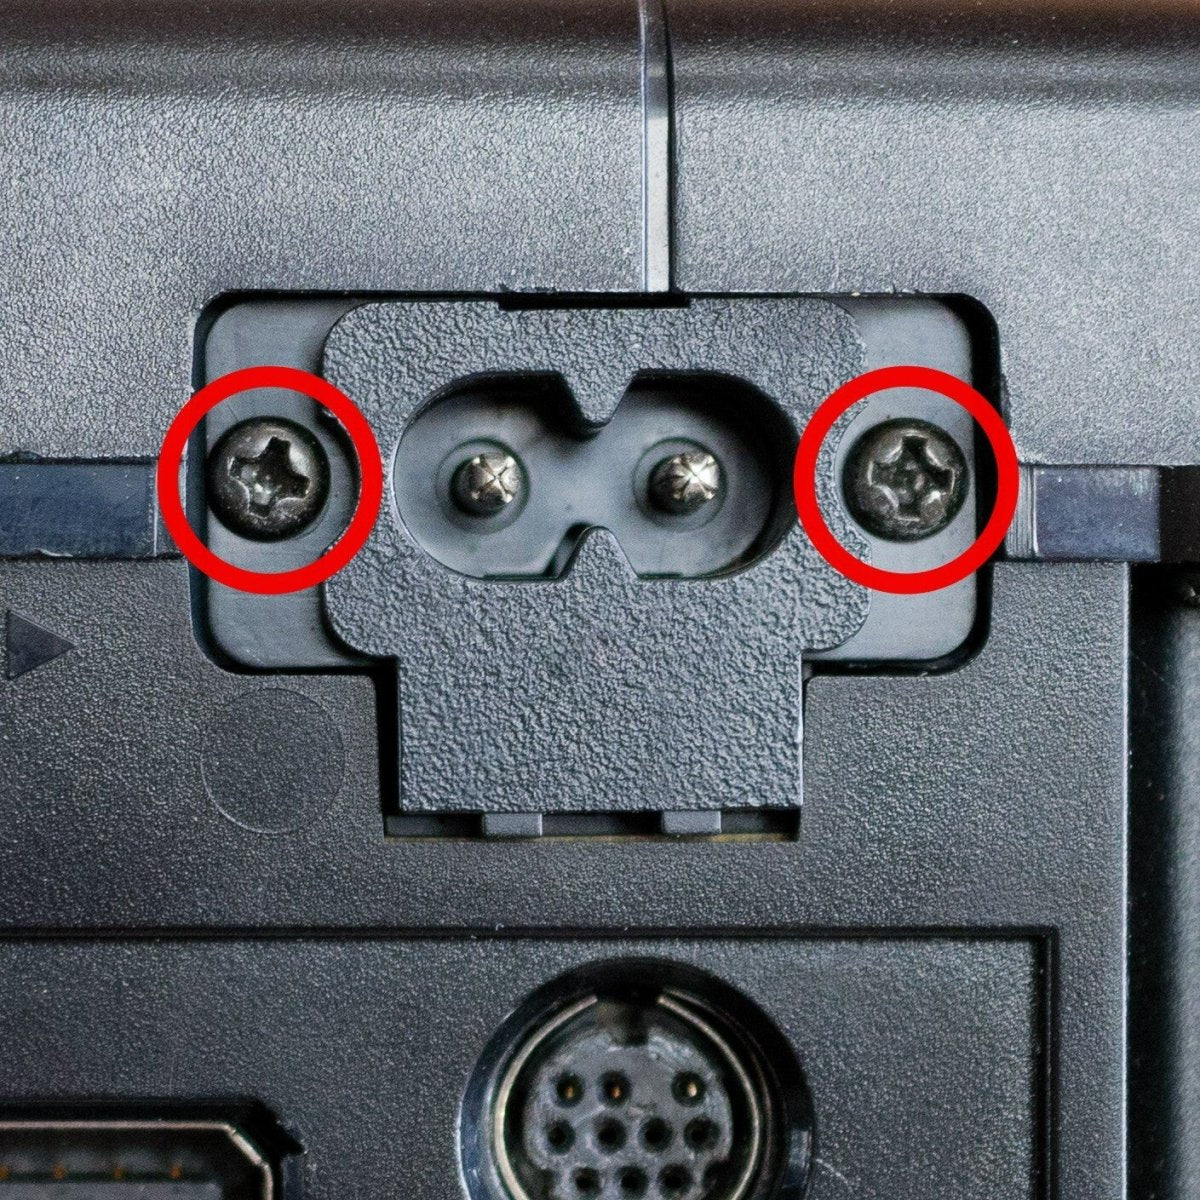
Unscrew the two power supply and five bottom shell screws as shown in the photo.
Remove the top lid and then remove the single power board screw (see photos).
Fit the robot_retro board in exactly the same way as the OEM power board was removed. Reattach the single original screw.
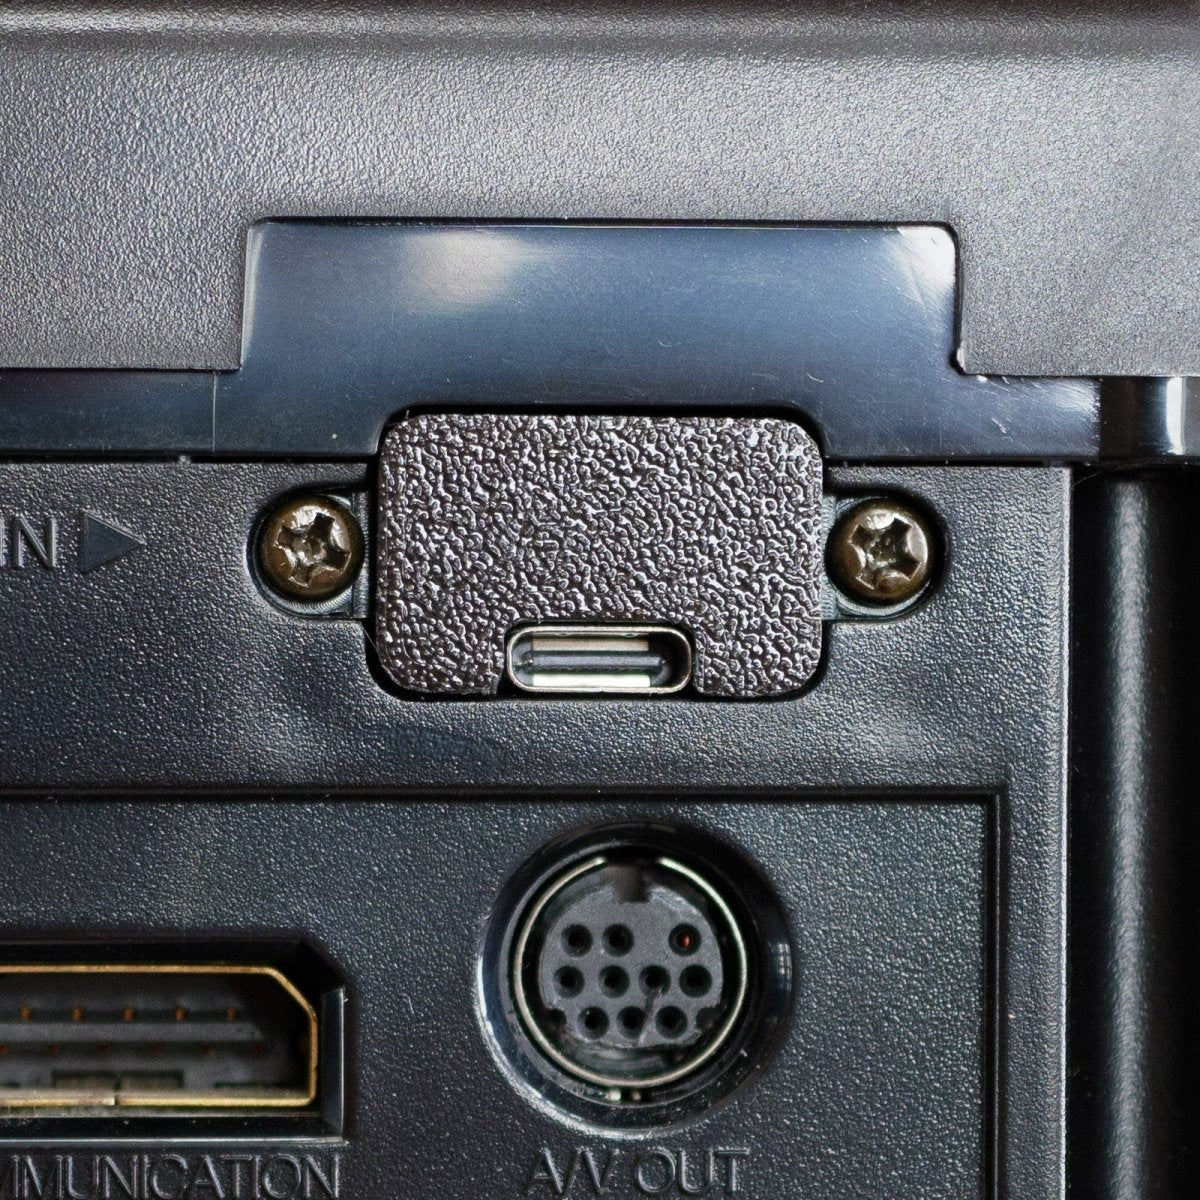
Fit 3D printer USBC spacer and attach the two power supply screws. Note, this does require a gentle push to get the screws to tap into the 3D spacer. I recommend to fit the first screw around halfway, then start the second while pushing down on the 3D spacer (towards the PCB). Once both are tapped, drive them both home. Do not overtighten.
Button up the console.
- Provides convenient and efficient power to your Saturn console.
- Replaces the stock power supply in most models of Saturn (see compatibility)
- Requires a USB C wall plug and USB C cable (not included)
- Easy install, no soldering needed, screw driver needed (not included)
- Includes black USB C spacer (other colours available seperately)
Description:The OEM Saturn power supply is a combined 110v/240v AC to DC converter. This is quite inefficient and noisy, which can manifest in a “fuzzy” video signal.
Also, plugging in a UK 240v supply to a 110v Japanese Saturn can cause damage to the Dreamcast.
Compatibility: This upgrade is compatible with all Saturn models with the exception of VA0 (Type A power supplies).
Works with Fenrir ODE optical drive replacement mod.
You will need your own USB C wall adapter and USB C cable, a 5v or 20v Power Delivery USBC charger such as those from Anker, uGreen and other reputable brands, most 30W charger USBC will work (they have to be able to output 15v/20v)
A screwdriver is the only thing needed to install this power board, no soldering or other technical skills needed. (Screwdriver not included)
What the robot_retro Saturn Power Board Offers:
Powered from a 15v or 20v Power Delivery USBC charger (e.g. Ankur, Dell, uGreen, etc.). Most 30W charger USBC will work (they have to be able to output 15v/20v).
Works with all PAL and US/Japan NTSC models except VA0 (Type A power supplies). Also removes the risk of accidentally plugging in 240V into a 110V system and causing damage.
Works perfectly with Fenrir.
Includes 5V header for Noctua fans and dedicated 12V/9V/5V/3.3V/GND 2.54mm pin headers for other power-hungry mods
Tested to be between 90 and 95% efficient across all loads.
Low signal noise and heat.
Drop in solution. No soldering, wires or complicated install required.
No flashing LEDS, perfect for clear shells.
Overvoltage, over temperature and fused supply.
3D printed spacer.
Other 3D spacer colours can purchase seperately
Voltage Setting:
The following voltage should be set using SW1 (instructions are also on the back of the PCB):
Type A (VA0) = Not compatible so N/A
Type B (VA1 to VA5) = +9V
Type C NTSC (VA6+) = +9v or +12v (either will work)
Type C PAL (VA6+) = Check original or use 9v if unsure
Installation:
A Phillips #2 screwdriver recommended for installation.
Unscrew the two power supply and five bottom shell screws as shown in the photo.
Remove the top lid and then remove the single power board screw (see photos).
Fit the robot_retro board in exactly the same way as the OEM power board was removed. Reattach the single original screw.
Fit 3D printer USBC spacer and attach the two power supply screws. Note, this does require a gentle push to get the screws to tap into the 3D spacer. I recommend to fit the first screw around halfway, then start the second while pushing down on the 3D spacer (towards the PCB). Once both are tapped, drive them both home. Do not overtighten.
Button up the console.
$16.03
Original: $53.43
-70%USB C Power supply replacement for Sega Saturn console PSU power board | Robot retro—
$53.43
$16.03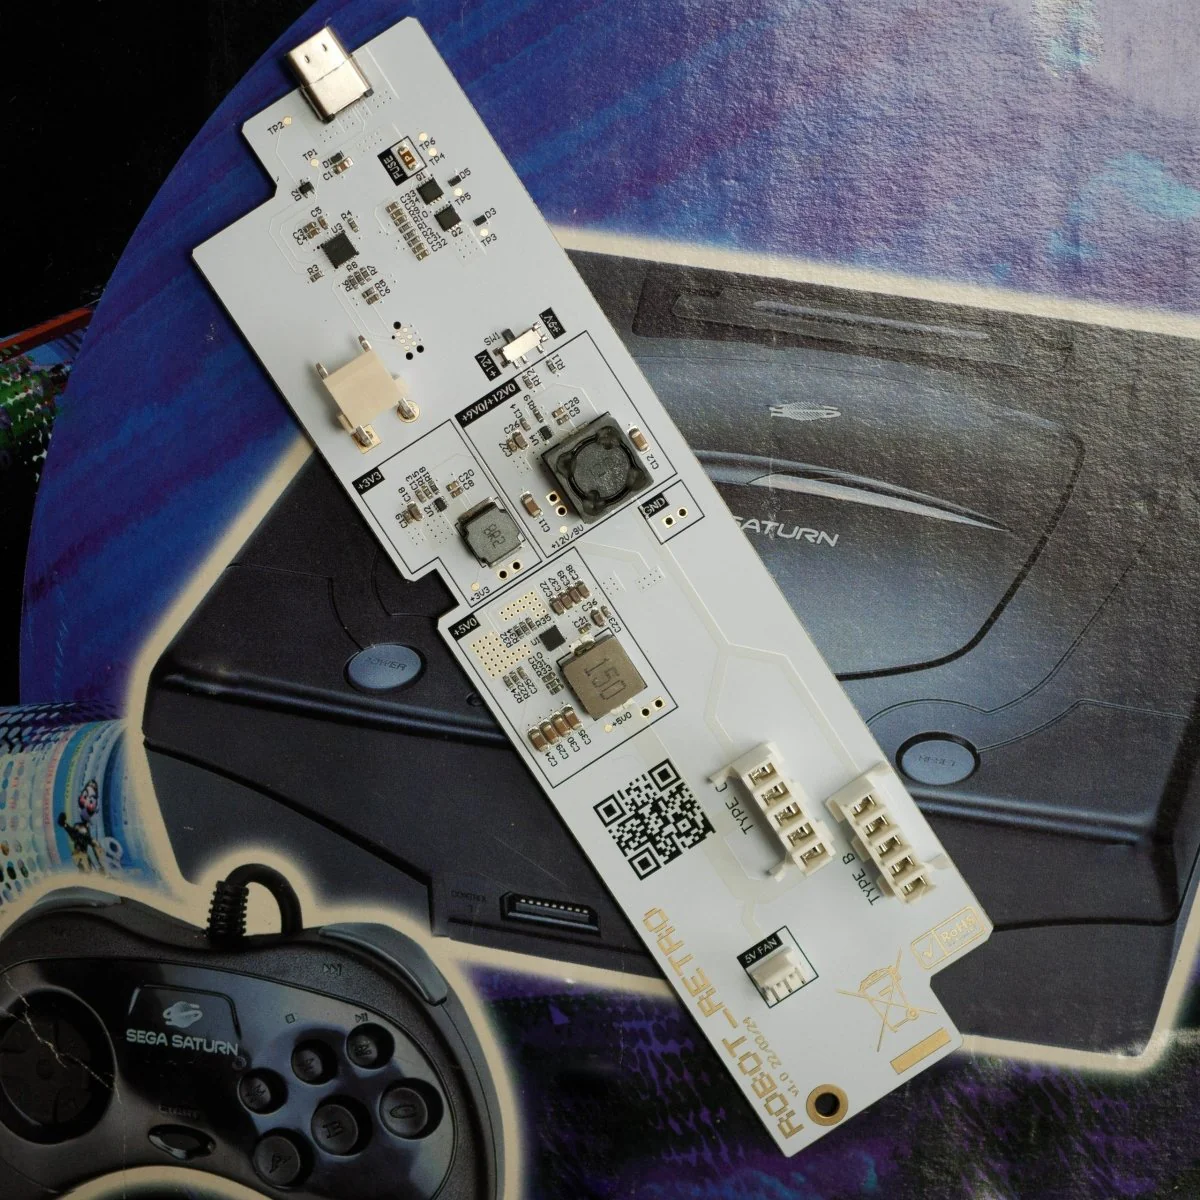


Description
Features:
- Provides convenient and efficient power to your Saturn console.
- Replaces the stock power supply in most models of Saturn (see compatibility)
- Requires a USB C wall plug and USB C cable (not included)
- Easy install, no soldering needed, screw driver needed (not included)
The OEM Saturn power supply is a combined 110v/240v AC to DC converter. This is quite inefficient and noisy, which can manifest in a “fuzzy” video signal.
Also, plugging in a UK 240v supply to a 110v Japanese Saturn can cause damage to the Dreamcast.
Compatibility: This upgrade is compatible with all Saturn models with the exception of VA0 (Type A power supplies).
Works with Fenrir ODE optical drive replacement mod.
You will need your own USB C wall adapter and USB C cable, a 5v or 20v Power Delivery USBC charger such as those from Anker, uGreen and other reputable brands, most 30W charger USBC will work (they have to be able to output 15v/20v)
A screwdriver is the only thing needed to install this power board, no soldering or other technical skills needed. (Screwdriver not included)
What the robot_retro Saturn Power Board Offers:
Powered from a 15v or 20v Power Delivery USBC charger (e.g. Ankur, Dell, uGreen, etc.). Most 30W charger USBC will work (they have to be able to output 15v/20v).
Works with all PAL and US/Japan NTSC models except VA0 (Type A power supplies). Also removes the risk of accidentally plugging in 240V into a 110V system and causing damage.
Works perfectly with Fenrir.
Includes 5V header for Noctua fans and dedicated 12V/9V/5V/3.3V/GND 2.54mm pin headers for other power-hungry mods
Tested to be between 90 and 95% efficient across all loads.
Low signal noise and heat.
Drop in solution. No soldering, wires or complicated install required.
No flashing LEDS, perfect for clear shells.
Overvoltage, over temperature and fused supply.
3D printed spacer.
Other 3D spacer colours can purchase seperately
Voltage Setting:
The following voltage should be set using SW1 (instructions are also on the back of the PCB):
Type A (VA0) = Not compatible so N/A
Type B (VA1 to VA5) = +9V
Type C NTSC (VA6+) = +9v or +12v (either will work)
Type C PAL (VA6+) = Check original or use 9v if unsure
Installation:
A Phillips #2 screwdriver recommended for installation.
Unscrew the two power supply and five bottom shell screws as shown in the photo.
Remove the top lid and then remove the single power board screw (see photos).
Fit the robot_retro board in exactly the same way as the OEM power board was removed. Reattach the single original screw.
Fit 3D printer USBC spacer and attach the two power supply screws. Note, this does require a gentle push to get the screws to tap into the 3D spacer. I recommend to fit the first screw around halfway, then start the second while pushing down on the 3D spacer (towards the PCB). Once both are tapped, drive them both home. Do not overtighten.
Button up the console.
- Provides convenient and efficient power to your Saturn console.
- Replaces the stock power supply in most models of Saturn (see compatibility)
- Requires a USB C wall plug and USB C cable (not included)
- Easy install, no soldering needed, screw driver needed (not included)
- Includes black USB C spacer (other colours available seperately)
Description:The OEM Saturn power supply is a combined 110v/240v AC to DC converter. This is quite inefficient and noisy, which can manifest in a “fuzzy” video signal.
Also, plugging in a UK 240v supply to a 110v Japanese Saturn can cause damage to the Dreamcast.
Compatibility: This upgrade is compatible with all Saturn models with the exception of VA0 (Type A power supplies).
Works with Fenrir ODE optical drive replacement mod.
You will need your own USB C wall adapter and USB C cable, a 5v or 20v Power Delivery USBC charger such as those from Anker, uGreen and other reputable brands, most 30W charger USBC will work (they have to be able to output 15v/20v)
A screwdriver is the only thing needed to install this power board, no soldering or other technical skills needed. (Screwdriver not included)
What the robot_retro Saturn Power Board Offers:
Powered from a 15v or 20v Power Delivery USBC charger (e.g. Ankur, Dell, uGreen, etc.). Most 30W charger USBC will work (they have to be able to output 15v/20v).
Works with all PAL and US/Japan NTSC models except VA0 (Type A power supplies). Also removes the risk of accidentally plugging in 240V into a 110V system and causing damage.
Works perfectly with Fenrir.
Includes 5V header for Noctua fans and dedicated 12V/9V/5V/3.3V/GND 2.54mm pin headers for other power-hungry mods
Tested to be between 90 and 95% efficient across all loads.
Low signal noise and heat.
Drop in solution. No soldering, wires or complicated install required.
No flashing LEDS, perfect for clear shells.
Overvoltage, over temperature and fused supply.
3D printed spacer.
Other 3D spacer colours can purchase seperately
Voltage Setting:
The following voltage should be set using SW1 (instructions are also on the back of the PCB):
Type A (VA0) = Not compatible so N/A
Type B (VA1 to VA5) = +9V
Type C NTSC (VA6+) = +9v or +12v (either will work)
Type C PAL (VA6+) = Check original or use 9v if unsure
Installation:
A Phillips #2 screwdriver recommended for installation.
Unscrew the two power supply and five bottom shell screws as shown in the photo.
Remove the top lid and then remove the single power board screw (see photos).
Fit the robot_retro board in exactly the same way as the OEM power board was removed. Reattach the single original screw.
Fit 3D printer USBC spacer and attach the two power supply screws. Note, this does require a gentle push to get the screws to tap into the 3D spacer. I recommend to fit the first screw around halfway, then start the second while pushing down on the 3D spacer (towards the PCB). Once both are tapped, drive them both home. Do not overtighten.
Button up the console.